Detection Models
Control which sensitive-data concepts and patterns can participate in detections, policies, and findings.
Navigation: Detection Models > Data Risk. Switch between Out of the box and Custom, then Contextual and Non contextual.
Configuration and options: Contextual models use the QuilrAI engine to recognize meaning beyond regex-only matching; non-contextual models use explicit patterns and may increase finding volume. Each available item exposes a risk level and enablement state.
Role-specific value: Administrators approve the model catalog and risk posture; Engineers test representative samples, watch volume, and tune sources of false positives.
Verification: A synthetic sample behaves consistently with the selected model and a related policy/finding uses the intended category.
Available out-of-the-box model families
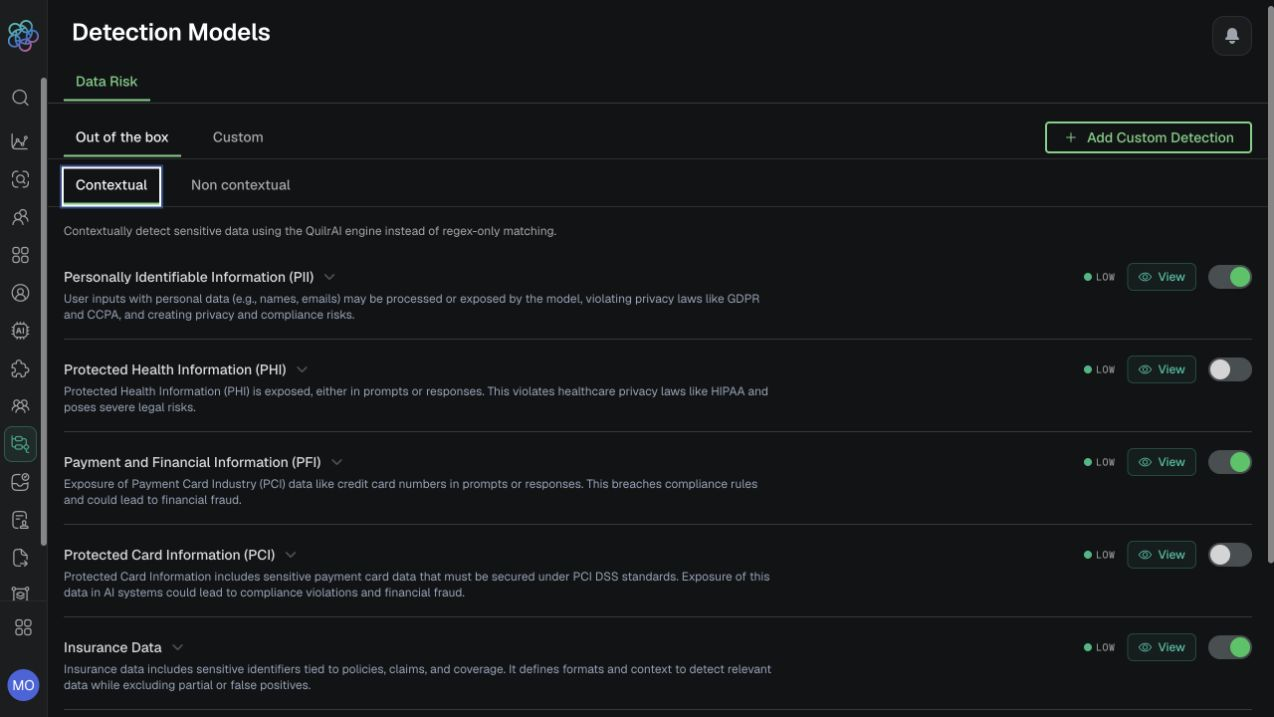
Contextual Data Risk models, descriptions, risk levels, view actions, and enablement switches.
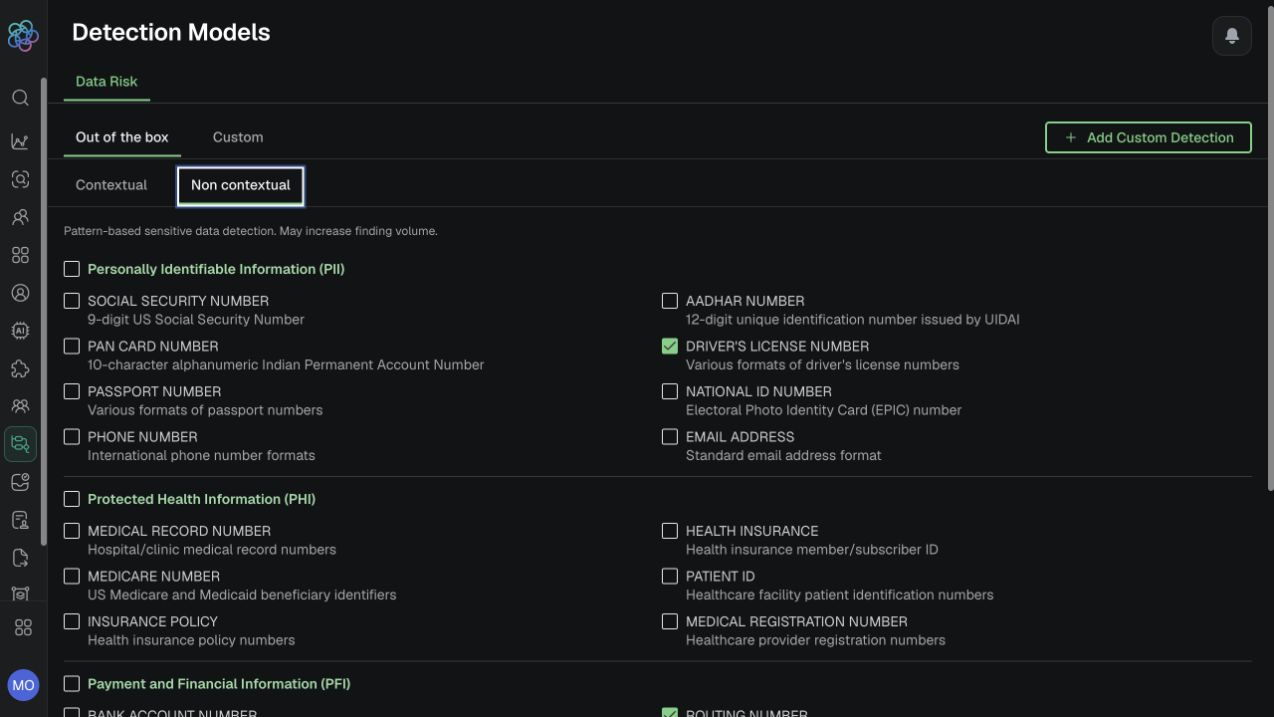
Non-contextual pattern-based models and individual pattern enablement.
Walkthrough: test before tuning
-
Choose Contextual when meaning matters; choose Non contextual when a known pattern is the intended signal.
-
Open View on a contextual model. The Test Detection Model drawer shows the model name, description, code name, and a Test and Refine sample area.
-
Use synthetic positive and negative samples. Do not paste live credentials, patient data, or customer records.
-
Record which model fired and compare it with policy conditions and the eventual finding category.
-
If volume is excessive, disable unneeded patterns or models in a controlled staged deployment, retest, and compare finding volume. Use Custom/Add Custom Detection only after your team has defined ownership and test cases.
Interpretation: Model risk level, finding criticality, matched category, event context, and policy outcome are separate evidence. The standard model and finding views described in the guide do not expose a numeric confidence score. A confidence value returned by a custom-model test should be interpreted in that test's context.
Expected result: Only approved model families and patterns are enabled for the intended use case.
Verification: Run positive and negative synthetic samples and confirm the intended model participates without causing unrelated findings. Confirm the exact custom-model fields in your tenant before building an operating procedure around them.
Model catalog and custom-model workflow
-
For a custom model, select Add Custom Detection and define the risk in precise, observable terms.
-
Choose the available detection technique - Intent, Precision, or Semantic - based on the behavior and example set.
-
Provide approved positive and negative inputs in Test and Refine. Review the returned verdict and confidence when available, then submit feedback and adjust the definition or examples.
-
Validate the model in a monitor-first policy and compare false positives, false negatives, and duplicate findings before broad use.
Lifecycle boundary: Built-in models can be enabled or disabled but not edited. The guide does not establish clone, import, or export support for detection models. Confirm custom-model fields and returned values in your tenant, and treat any test confidence separately from finding criticality and policy action.
Validate model changes in a staged policy and compare the resulting findings.