Triage Center
The Triage center is where you work the findings queue. It helps you close findings that no longer need action, see who changed what, set up rules for new findings, and tune detections so the same false positives stop appearing.
Open it from Findings & Interactions with the Triage center link at the top right, or from the Triage menu next to Export.
Triage states
Every finding has one of three states. You can filter by them on the Findings page with the All, Open and Resolved toggle, or with the Triage status filter.
Read the headline tiles
The tiles at the top give you the state of the queue at a glance. Use 7 days, 30 days or 90 days to change the period for the tiles that name it.
- Suggestions ready - how many bulk closes are waiting for you.
- Resolved - findings closed in the period, per day. Click to see them in Findings.
- Suggested to resolve - open findings that one of the suggestions covers.
- Resolved by reason - the reasons findings were closed for. Select a reason to see those findings.
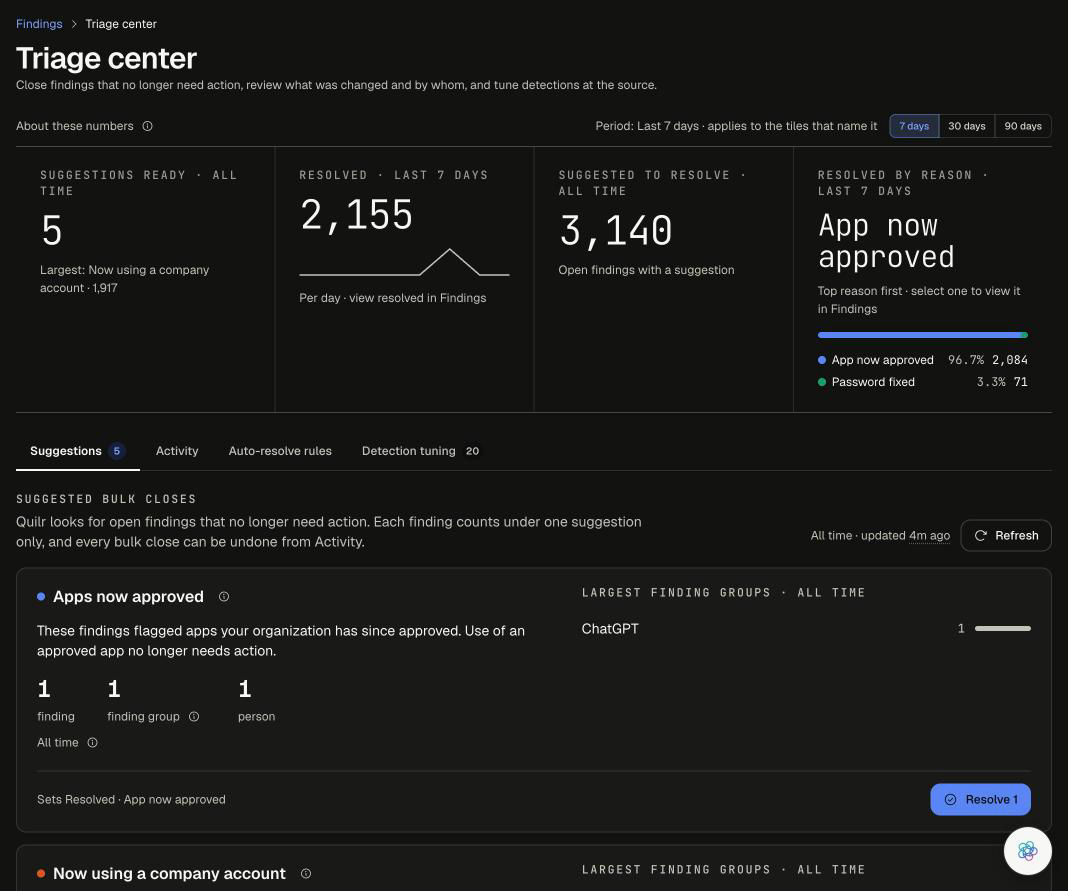
The four tabs below the tiles are the four ways to work the queue.
Suggestions: close findings in bulk
Quilr looks for open findings that no longer need action and groups them into suggestions, for example Apps now approved, Now using a company account, People no longer active, Blocked, not retried for 14 days and Old notices. Each finding counts under one suggestion only.
To close a suggestion:
- Open the Suggestions tab.
- Read the description on the card. It says why these findings can be closed.
- Check the counts (findings, finding groups and people) and the Largest finding groups list on the right, to make sure the suggestion matches what you expect.
- Click Resolve (the button shows how many findings it will close).
- In the dialog, review the summary, optionally add a comment for the finding history, and click Resolve.
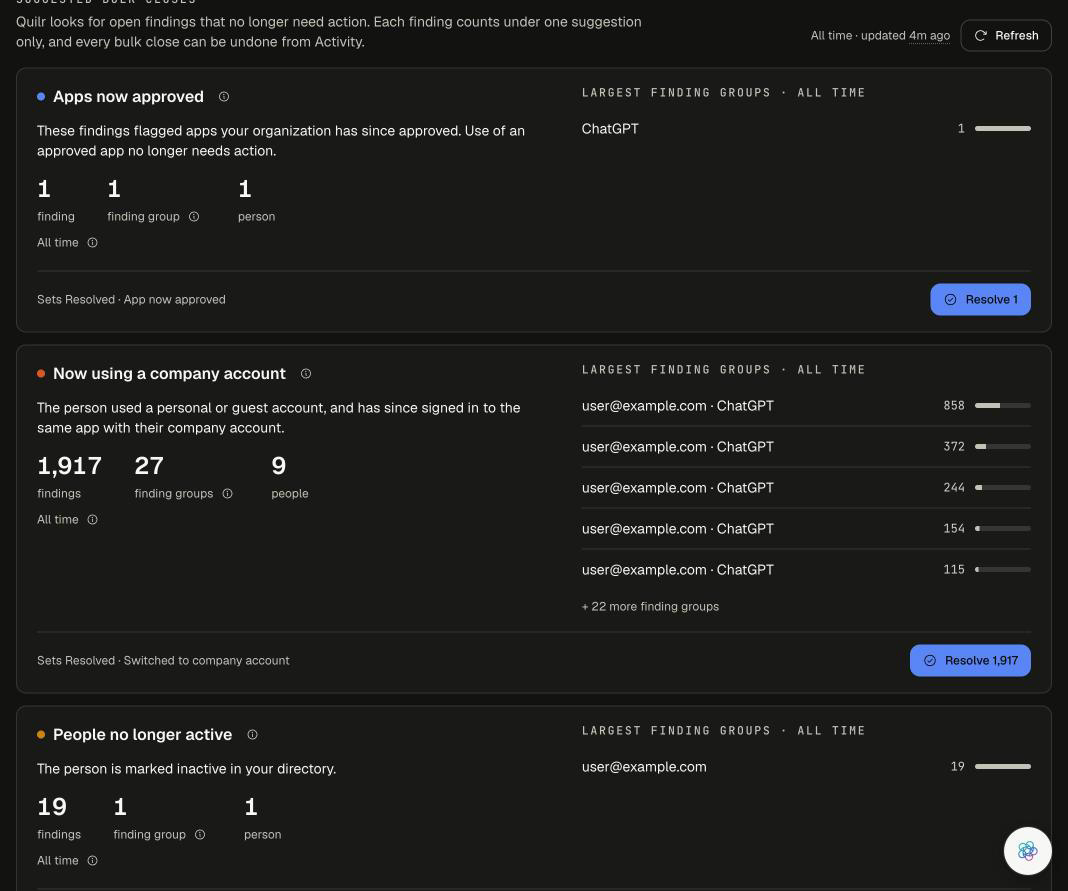
The count is re-checked when you resolve, so it may shift slightly. Every bulk close can be undone from the Activity tab.
Activity: see and undo changes
The Activity tab lists every bulk close, auto-resolve rule change and undo, newest first.
- Open the Activity tab.
- Narrow the list with the period menu, the All, Suggestion and Undo toggle, the Anyone menu (who made the change) and the Any reason menu.
- Each row shows what was closed, how many findings, the state and reason they were set to, who did it and when. Click the arrow at the start of a row for more detail.
- Use View findings to open the affected findings, or Undo to reopen them.
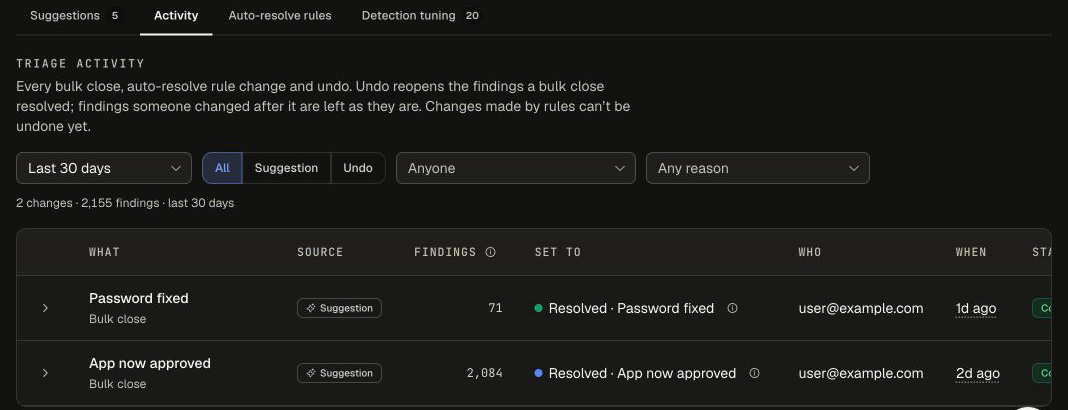
Undo reopens the findings that a bulk close resolved. Findings someone changed after the bulk close are left as they are. Changes made by auto-resolve rules can't be undone yet.
Auto-resolve rules: handle new findings automatically
Rules resolve, review or tag new open findings that match a condition, so you don't have to close the same kind of finding again and again.
Start from a suggested rule
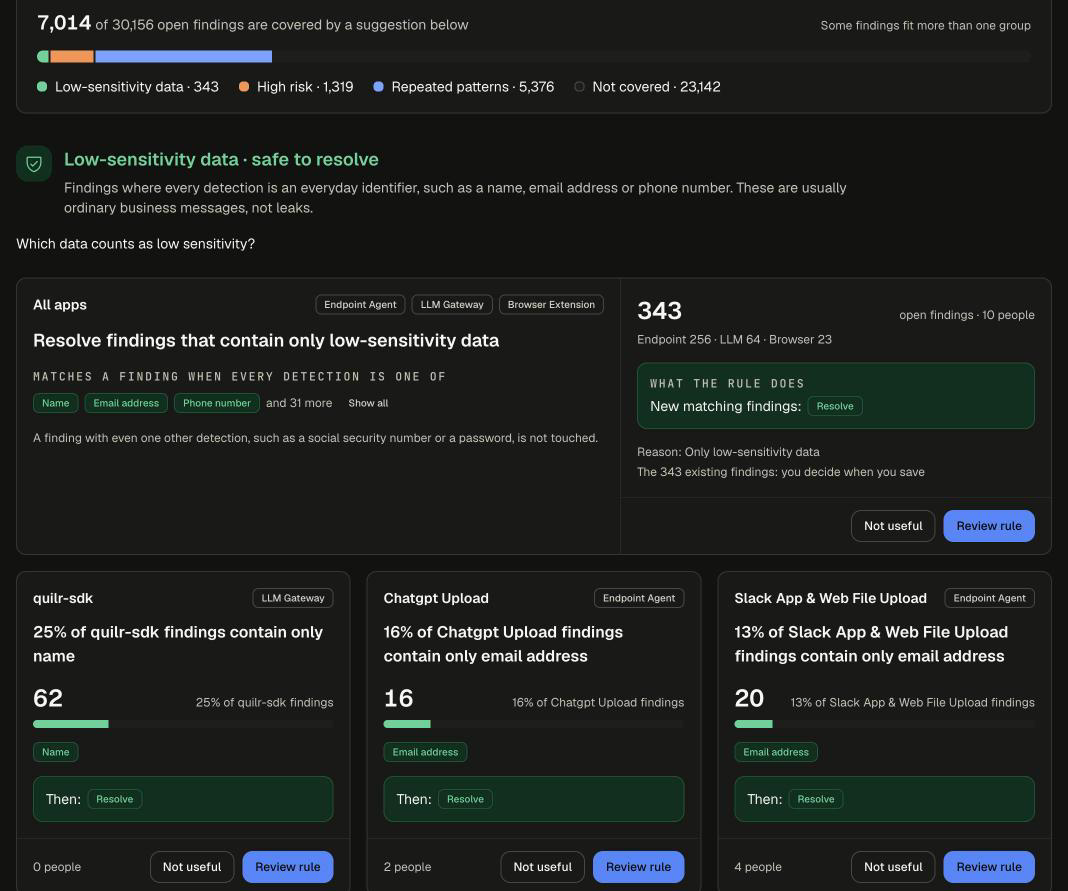
The top of the tab shows how many open findings the suggested rules would cover, split into Low-sensitivity data, High risk and Repeated patterns.
- Open the Auto-resolve rules tab.
- Read a suggested rule card: what it matches, how many open findings and people it covers, and what the rule does (for example Resolve, or In review and a tag).
- Click Review rule to open it as a draft. Nothing changes until you save.
- When you save, choose whether the rule also applies to the findings that already exist.
- If a suggestion does not fit your organisation, click Not useful.
Create your own rule
Under Your rules, click Create a rule and turn a saved condition into an action, for example resolve findings about test accounts, or tag findings for one team.
Rules follow a few simple guarantees:
- They act only on open findings.
- Findings someone already resolved or put in review are never changed.
- A later manual change always wins.
- Rules run in list order, and every change they make is listed in Activity.
Detection tuning: fewer false positives at the source
Triage closes findings that already exist. Detection tuning stops the same false positives from being raised in the first place. See Detection tuning for the step-by-step guide.