Developer Guide
For developers who have been granted self-service access. This page covers signing in, getting a key, reading your own logs and findings, and requesting settings changes.
Want the concepts first? See the Overview. Setting self-service up for your org? See the Admin Guide. New to the gateway itself? The Quick Start and the Integration Guide cover endpoints, base URLs, and SDK examples.
Signing In
Sign in with your work account. If you have self-service access, you land in the Self-Service portal instead of the full admin dashboard.
You only see the apps an admin granted you. If the portal is empty, nobody has given you access to an app yet - ask your QuilrAI platform admin.
Your Apps
Each app you can access appears as a card:
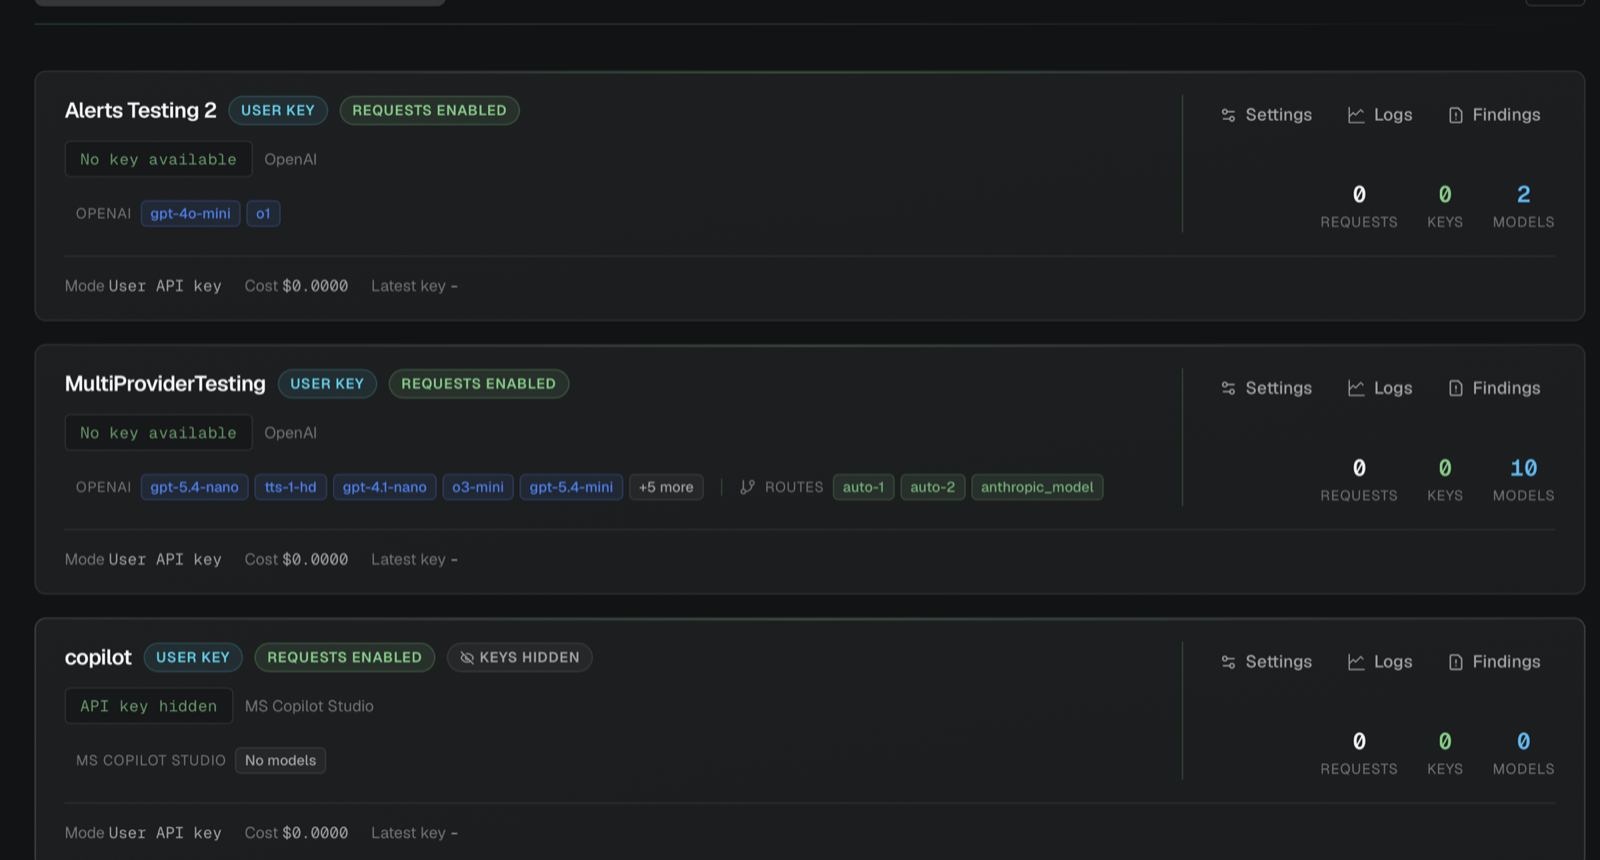
A card tells you:
The Three Tabs
Open an app to get to its tabs:
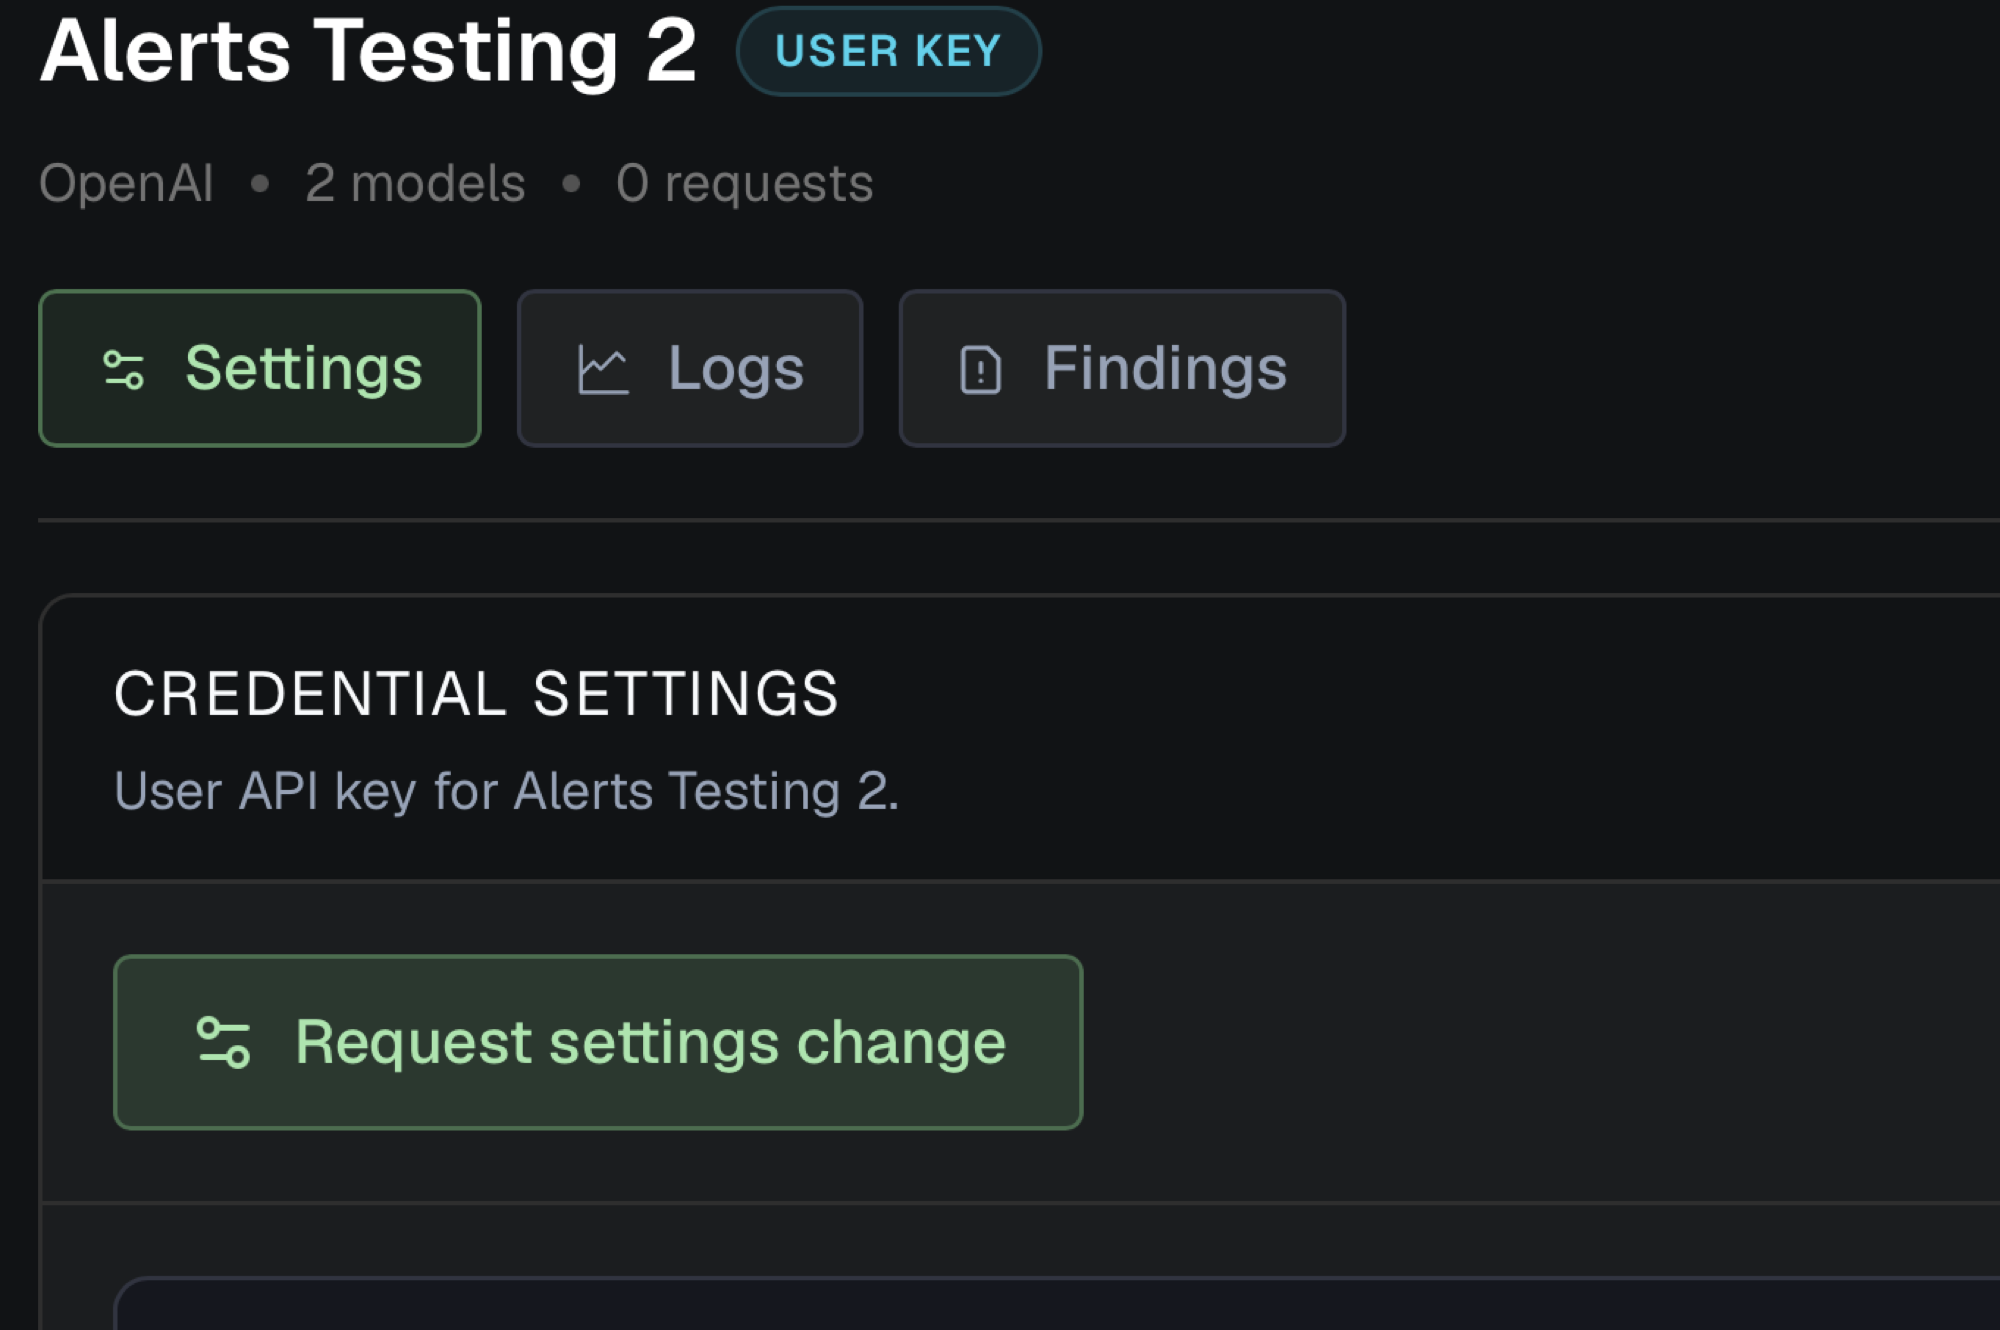
Settings
Shows the credential mode and app details: provider, models, routing groups, and estimated cost. In Named User API Keys mode this is also where you manage your keys. If you have Settings Request Access, a Request settings change action appears here.
The routing groups listed here are the names you can pass as a model to load balance or fail over across providers - see Request Routing. Which providers, endpoints, and API shapes the app can reach is covered in Provider Support.
Logs
The app's request logs. You see your own activity only, unless an admin granted you All Logs Visibility for this app.
Logs get considerably more useful when your requests carry context. Pass a conversation ID to group a multi-turn exchange into one thread (Conversation Grouping), or send standard tracing or agent headers so each call is tied to the agent run that produced it (Agent Monitoring). To pull the same records into your own tooling, ask an admin for a log export key and use the Log Export API.
Findings
Guardrail activity for the app - blocked, monitored, anonymized, and normal requests - with per-request detail. Scoped to your own activity under the same rule as Logs.
This is where you check why a request was blocked or came back redacted: the finding names the category that fired and the action that was applied. Security Guardrails explains the categories, risk levels, and actions behind those results.
Getting Your Key
What you get depends on the app's credential mode.
Shared Parent Key mode
The app already has a key. Copy it from the Settings tab and use it as-is. If the app shows API key hidden, an admin has turned off key visibility for you - ask them for the value.
Named User API Keys mode
You create your own key:
-
Open the app's Settings tab.
-
Create a key and give it a name that says where it will live, for example
Alice local devoralice-ci-runner. -
Copy the full value. It looks like the app key with a self-service payload appended:
sk-quilr-<app-key>:ss1.<encoded-identity>.<random> -
Use the whole string anywhere you'd normally use an
sk-quilr-…key:from openai import OpenAI
client = OpenAI(
base_url='https://guardrails-usa-2.quilr.ai/openai_compatible/',
api_key='sk-quilr-xxx:ss1.a1b2c3.d4e5f6' # your named self-service key
)
response = client.chat.completions.create(
model='gpt-4o-mini',
messages=[{'role': 'user', 'content': 'Hello!'}]
)
You can hold several keys for the same app - one per machine or environment is a good habit, since you can then revoke one without breaking the others. Your active keys are listed with their created and last-used times, and you can revoke any of them yourself.
Every request made with your key is attributed to you, so your logs, usage, and findings are your own. That attribution is the same per-user identity described in Identity Aware.
In Named User API Keys mode the gateway only accepts a valid named self-service key. The parent sk-quilr-… key on its own, a JWT, or an X-User-Email header alone are rejected.
Using the Key
The key is an ordinary gateway credential, so everything in the main gateway docs applies:
Requesting a Settings Change
If you have Settings Request Access, use Request settings change on the Settings tab. You get the app's full settings editor and submit your edits as a request:
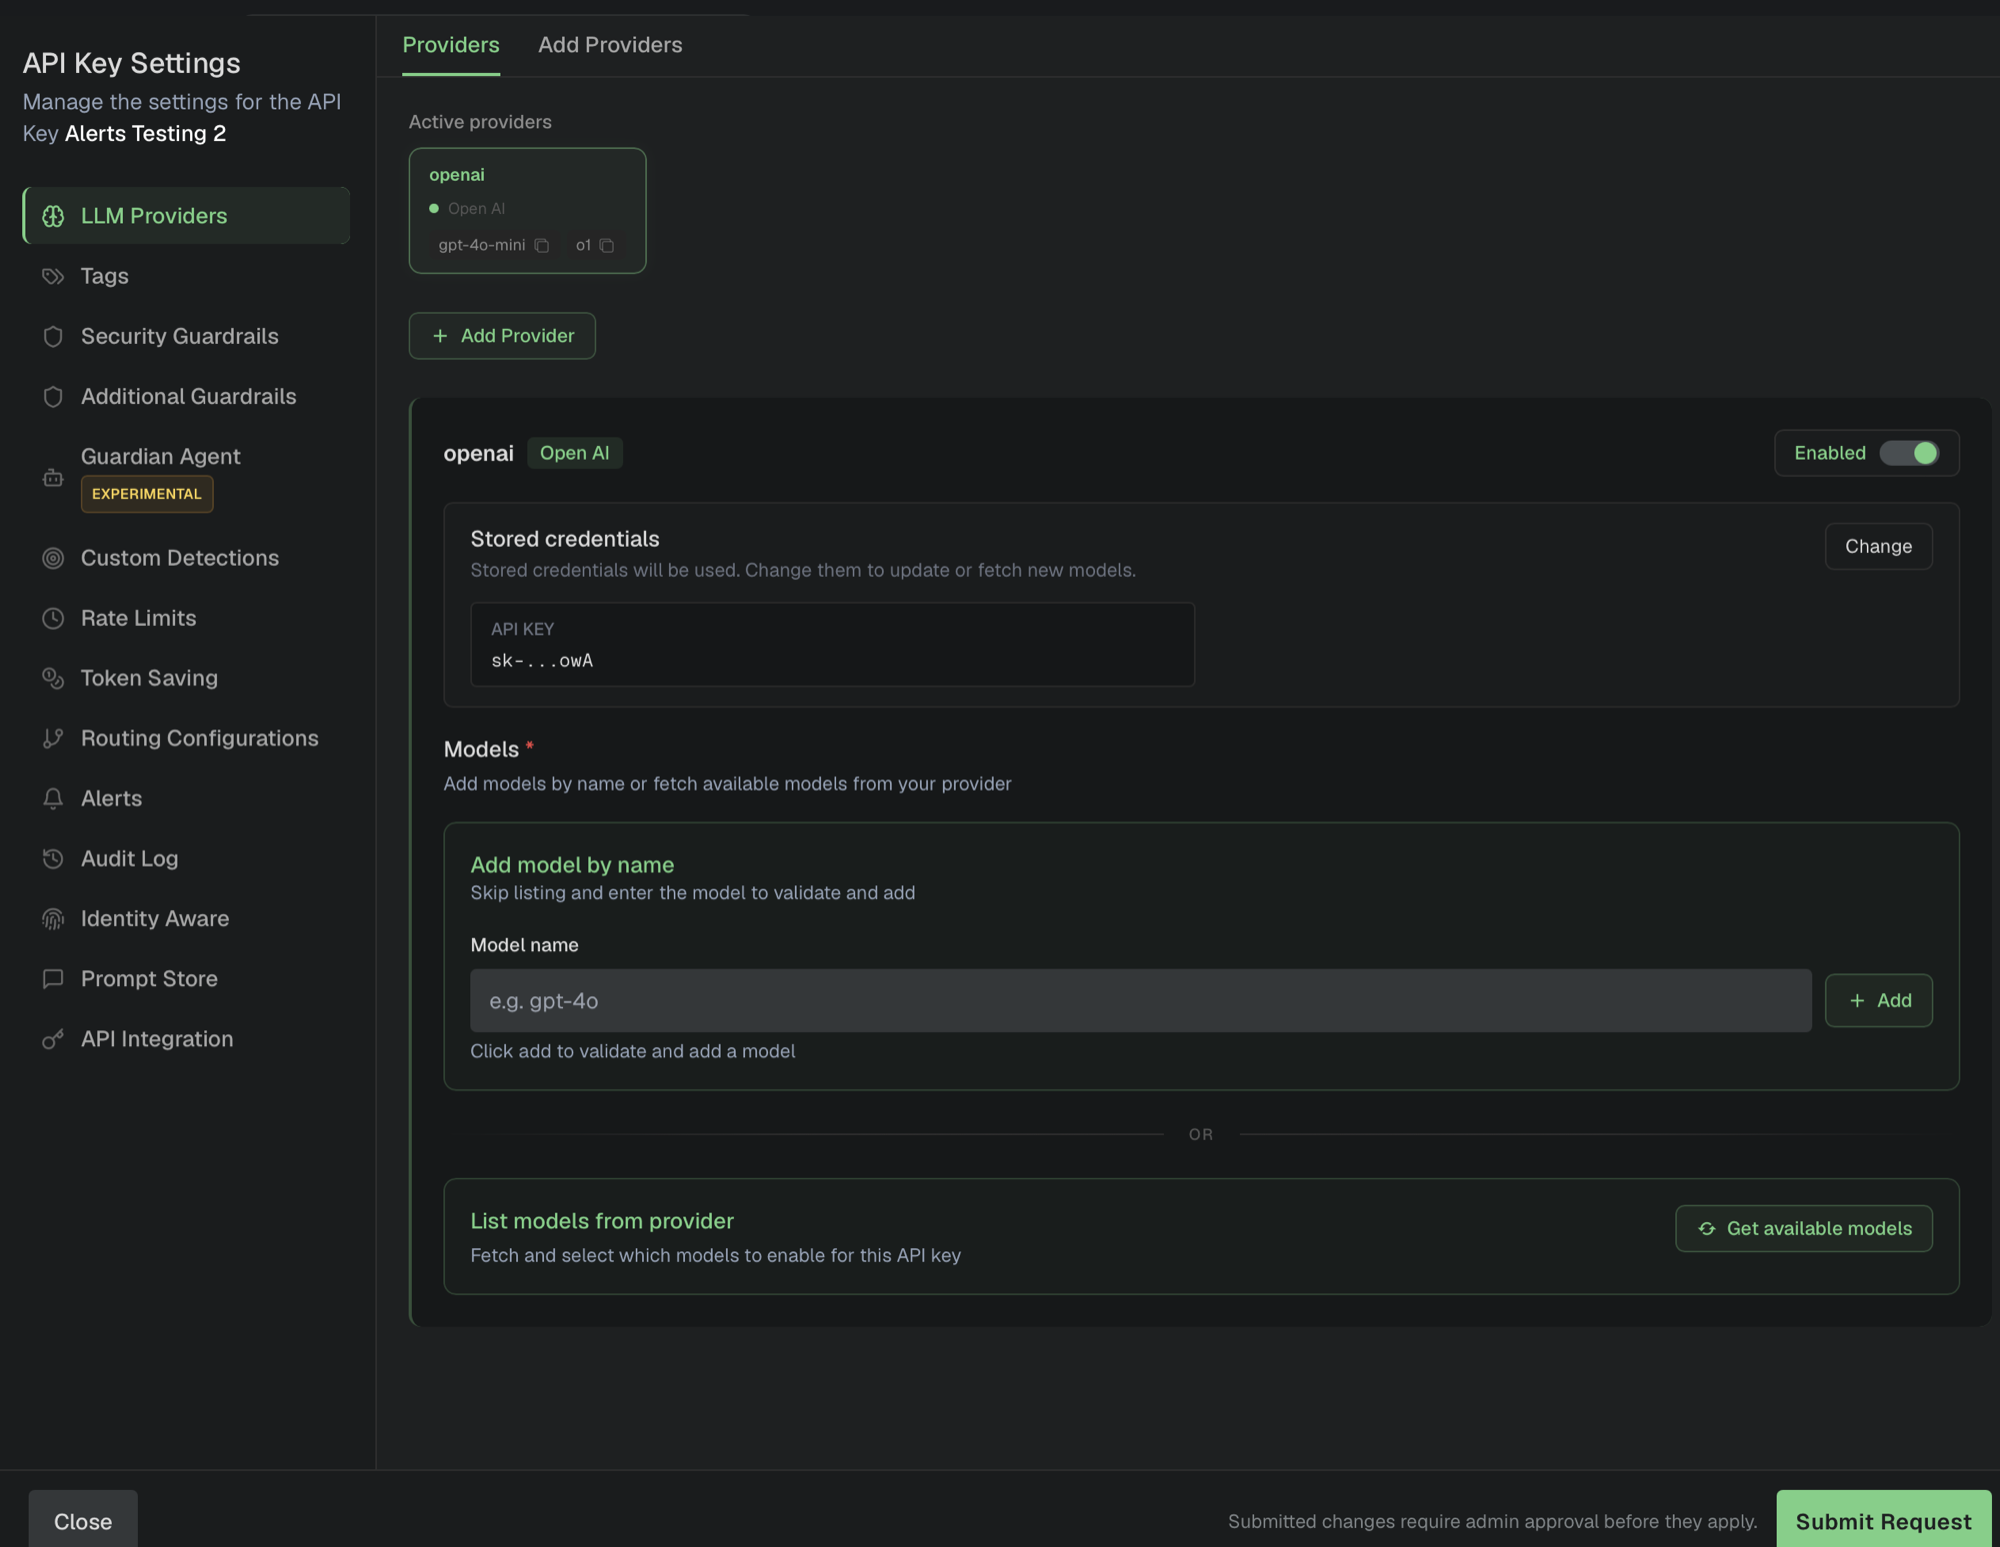
Nothing you edit here is live. The footer says it plainly: submitted changes require admin approval before they apply. Choose Submit Request to send it for review.
Track your submissions under My Change Requests in the portal. Each request shows one of these statuses:
Admins review requests from the app's Audit Log tab - see Audit Log. A stale status means the app's config changed after you submitted; approval re-checks against the config your request was based on, so open the editor again and resubmit.
The self-service configuration itself, including credential mode and who has access, is admin-only and does not appear in the portal's settings editor.
If you have Direct Settings Update
Some users are granted Direct Settings Update instead. In that case your saves apply to the live app immediately, with no approval step. There is no undo in the portal, but every change is versioned in the app's config history and an admin can roll it back - see Audit Log.
Inside the Settings Editor
The sections you are most likely to open, and what each one does. Each links to its full feature page.
Security Guardrails
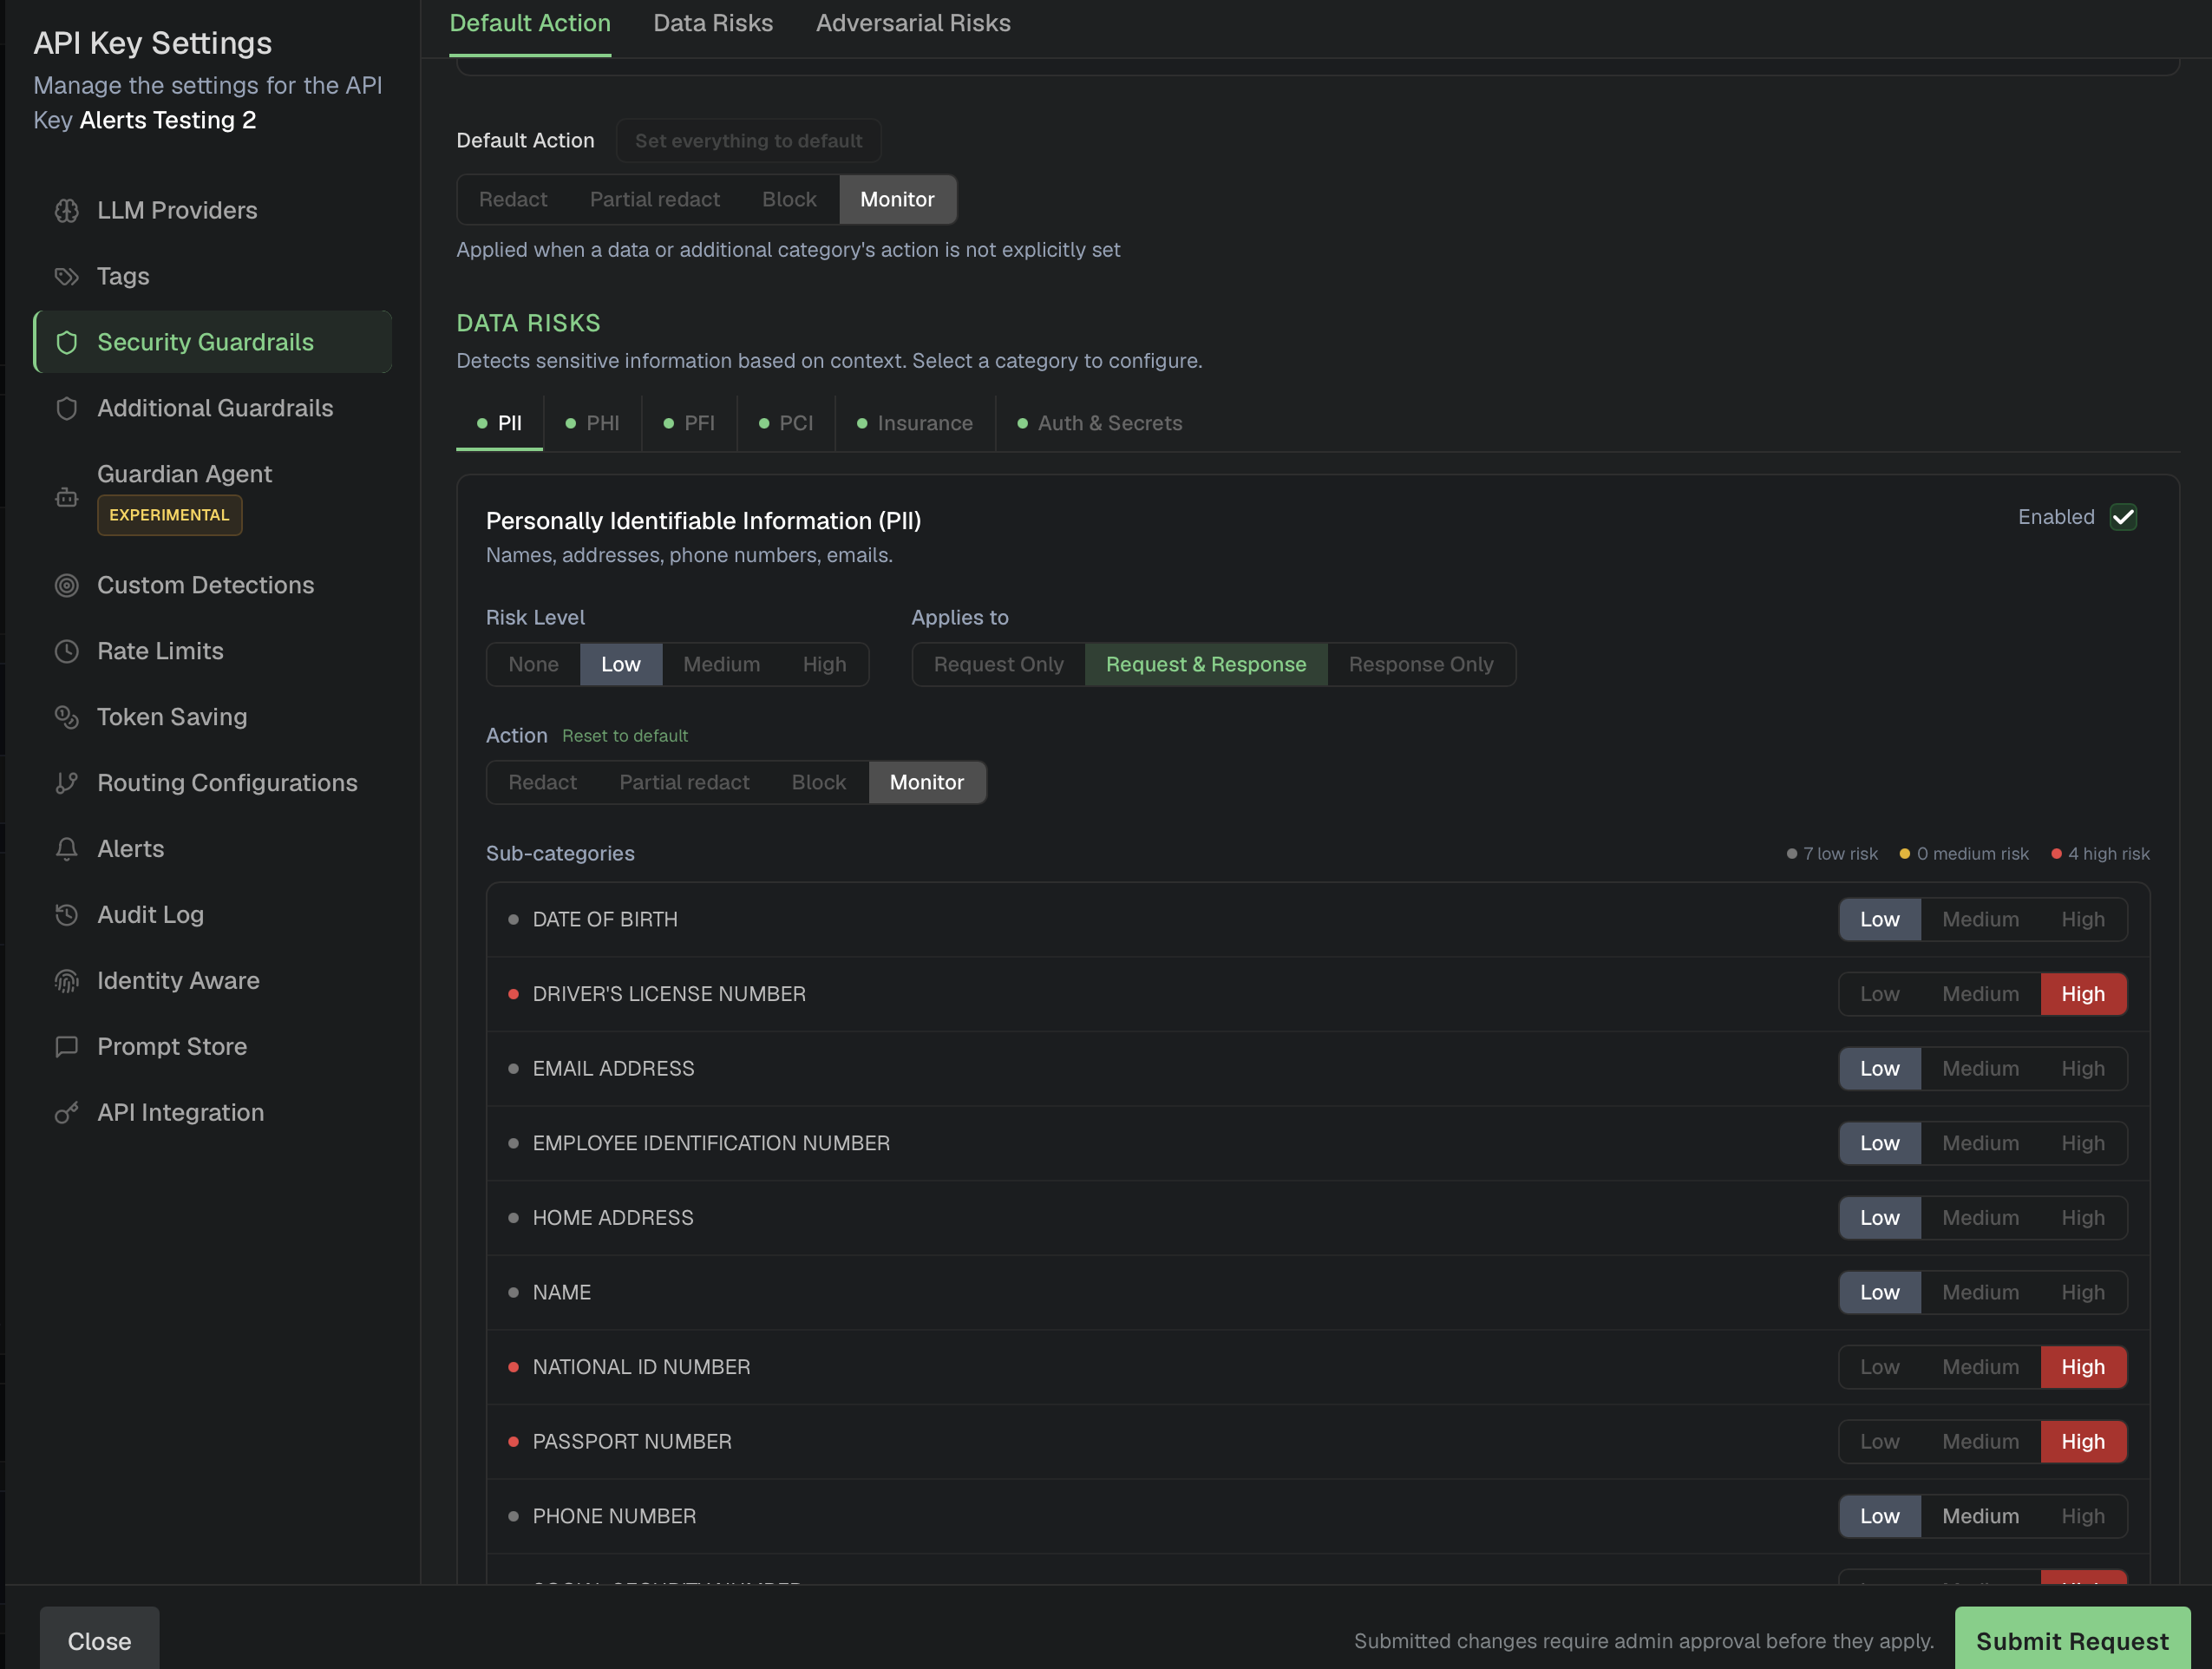
Detection of sensitive data and adversarial input on the way to and back from the model. Set a Default Action for anything you have not configured explicitly - Redact, Partial redact, Block, or Monitor - then tune each category under Data Risks (PII, PHI, PFI, PCI, Insurance, Auth & Secrets) and Adversarial Risks (prompt injection, jailbreak, and similar).
Per category you choose a Risk Level (how wide a net it casts), Applies to (request only, response only, or both), and the Action. Individual sub-categories such as Passport Number or National ID can be raised on their own without changing the rest.
Full details: Security Guardrails.
Additional Guardrails
A catalogue of named detectors on top of the broad categories above, grouped as PII, PHI, PFI, PCI, Auth & Secrets, Device / Network & Online Identifiers, Telecom Subscriber Data, and Employee / HR Data. Each detector - Social Security Number, Aadhar Number, PAN Card Number, Driver's License Number, and so on - is enabled individually and carries its own Applies to, Risk Level, and Action.
Reach for this when you need one specific value caught or ignored rather than a whole category.
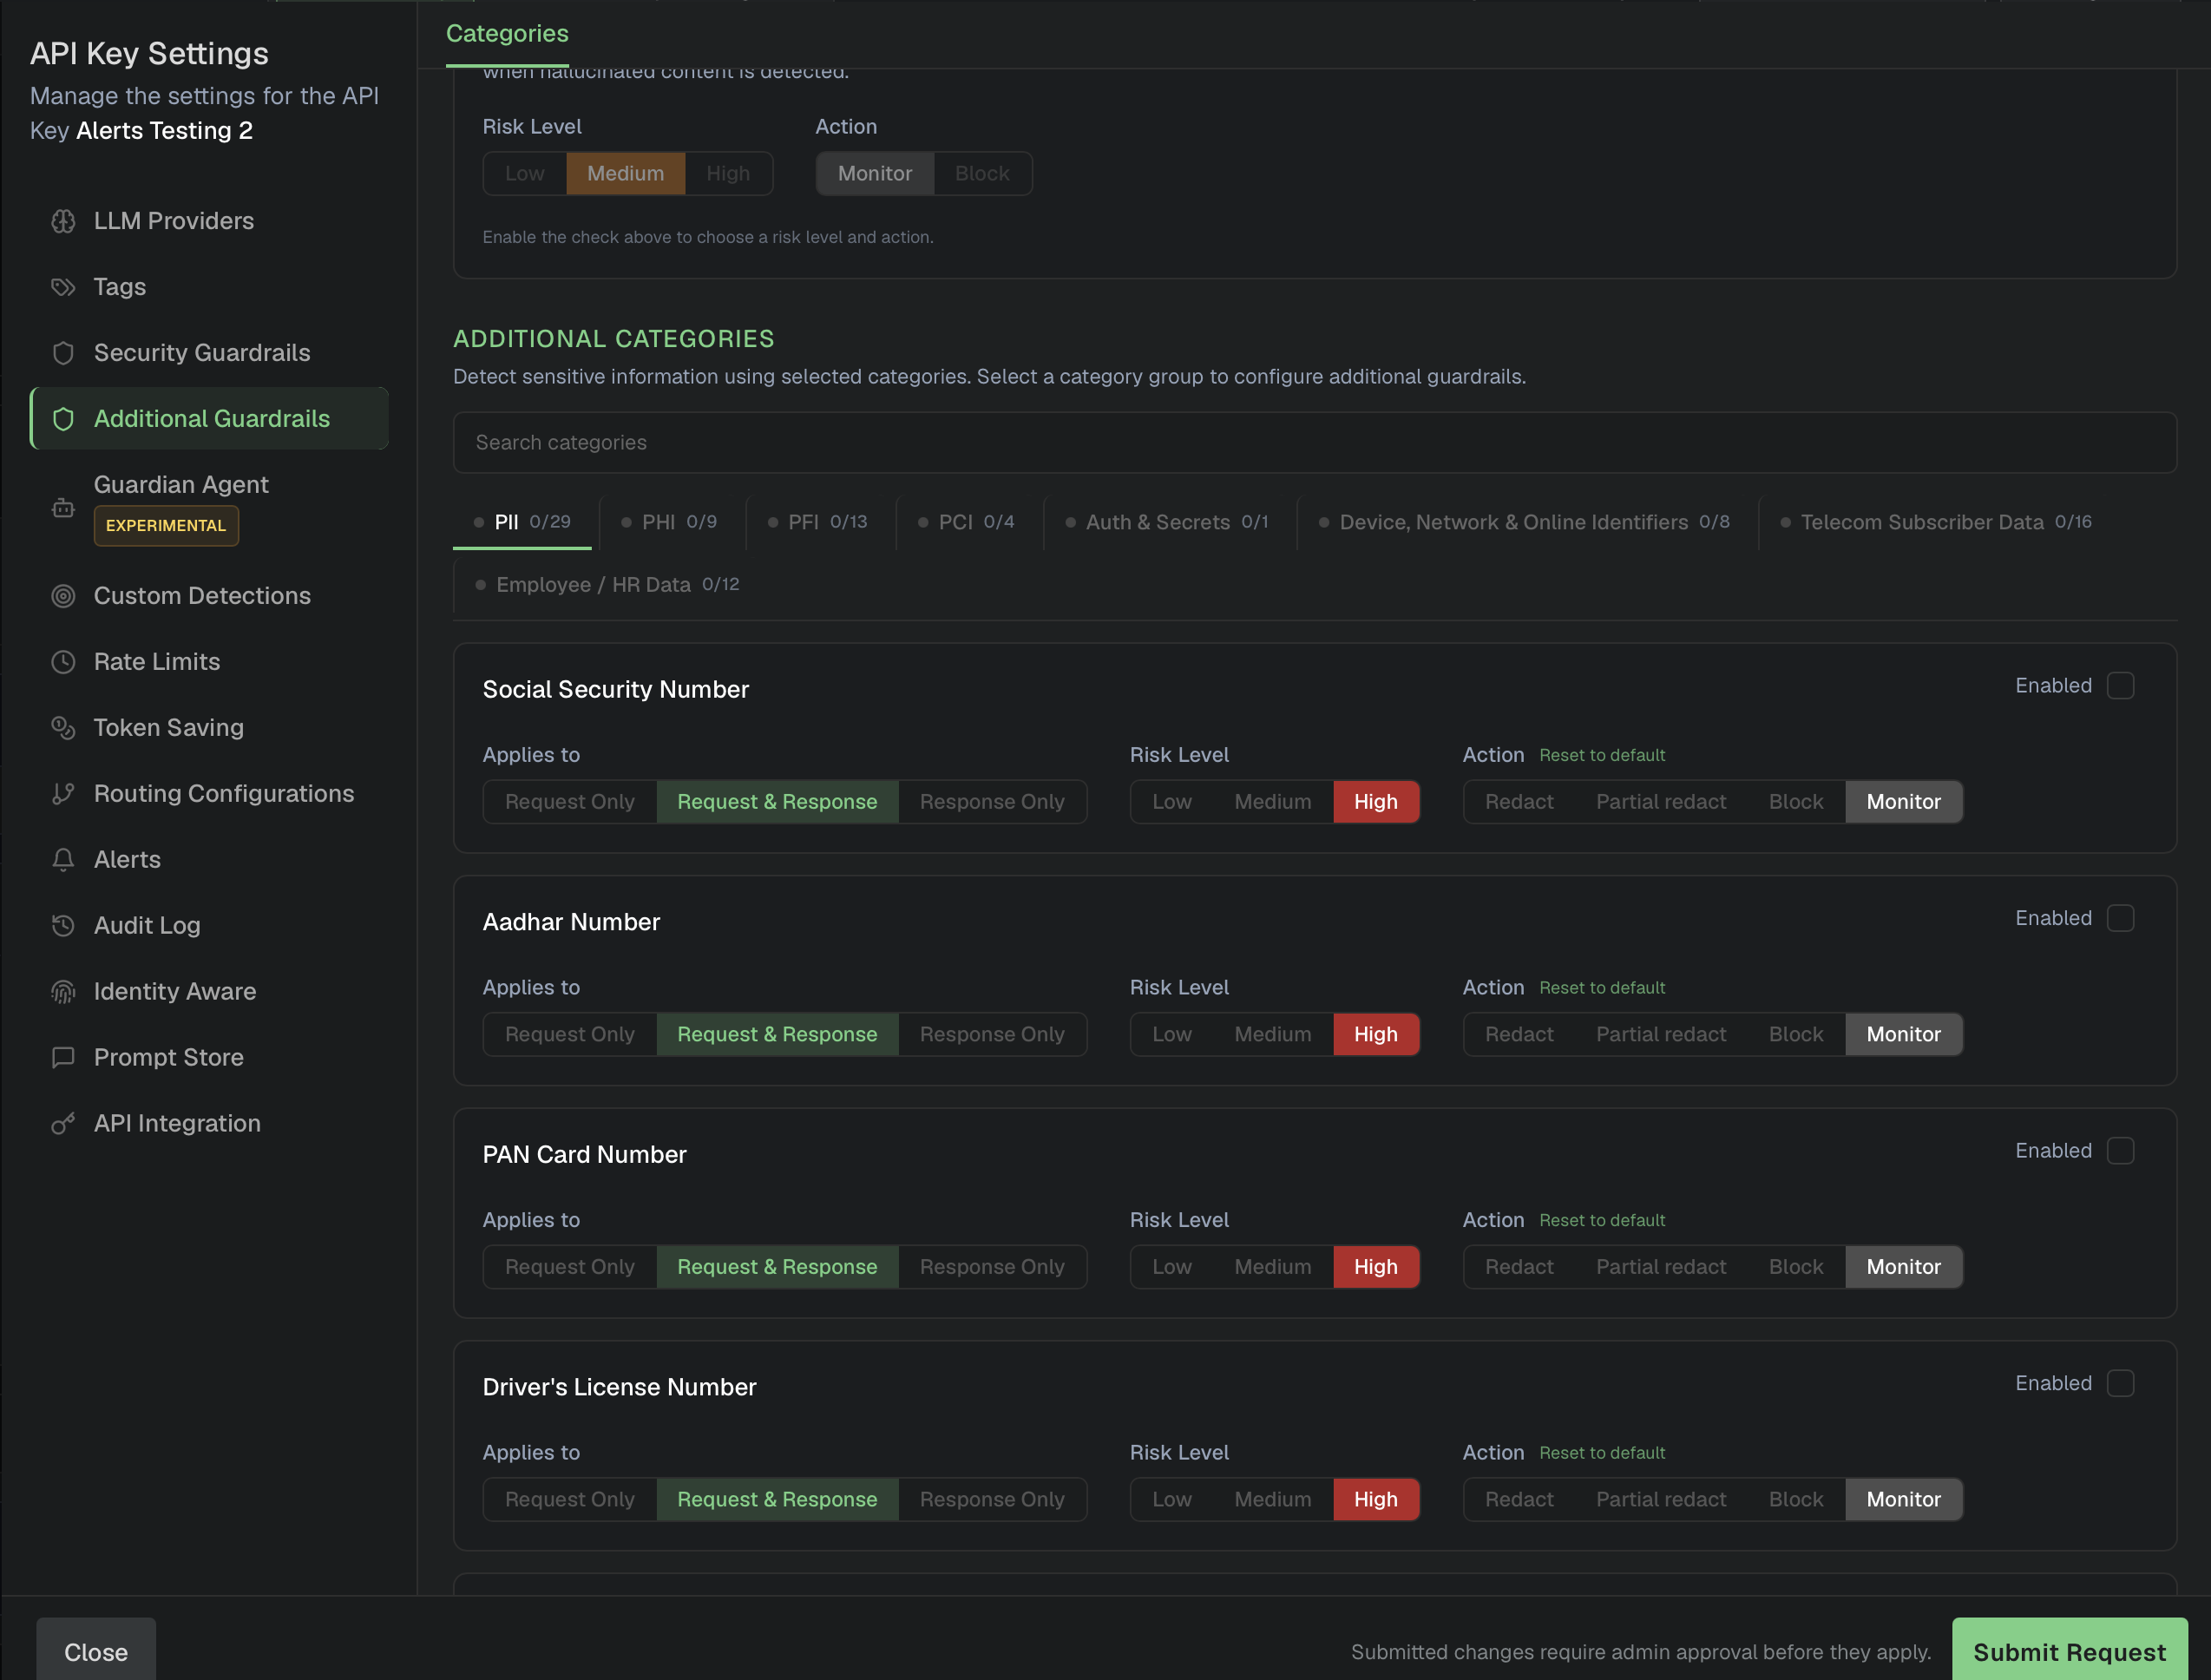
These are configured alongside the category actions described in Security Guardrails.
Guardian Agent
Marked EXPERIMENTAL in the portal.
Guardian Agent is a policy check the gateway runs on your traffic, not a separate agent or a different model endpoint. It can add instructions to a request before it reaches the model, retry an unsafe answer once with corrective guidance, append an advisory, or block the request. Two groups:
- Coding Helpers - reads install commands and manifests, and nudges the model away from packages with known vulnerabilities (Dependency Security Check) or outdated pinned versions (Latest Version Suggestions).
- Task Adherence - compares the latest user message against the app's system prompt and either nudges the model back on purpose or blocks the request when the conversation drifts. Sensitivity is adjustable.
A Custom Guardian Prompt lets you state the app's policy in plain language, and it is judged against the recent conversation.
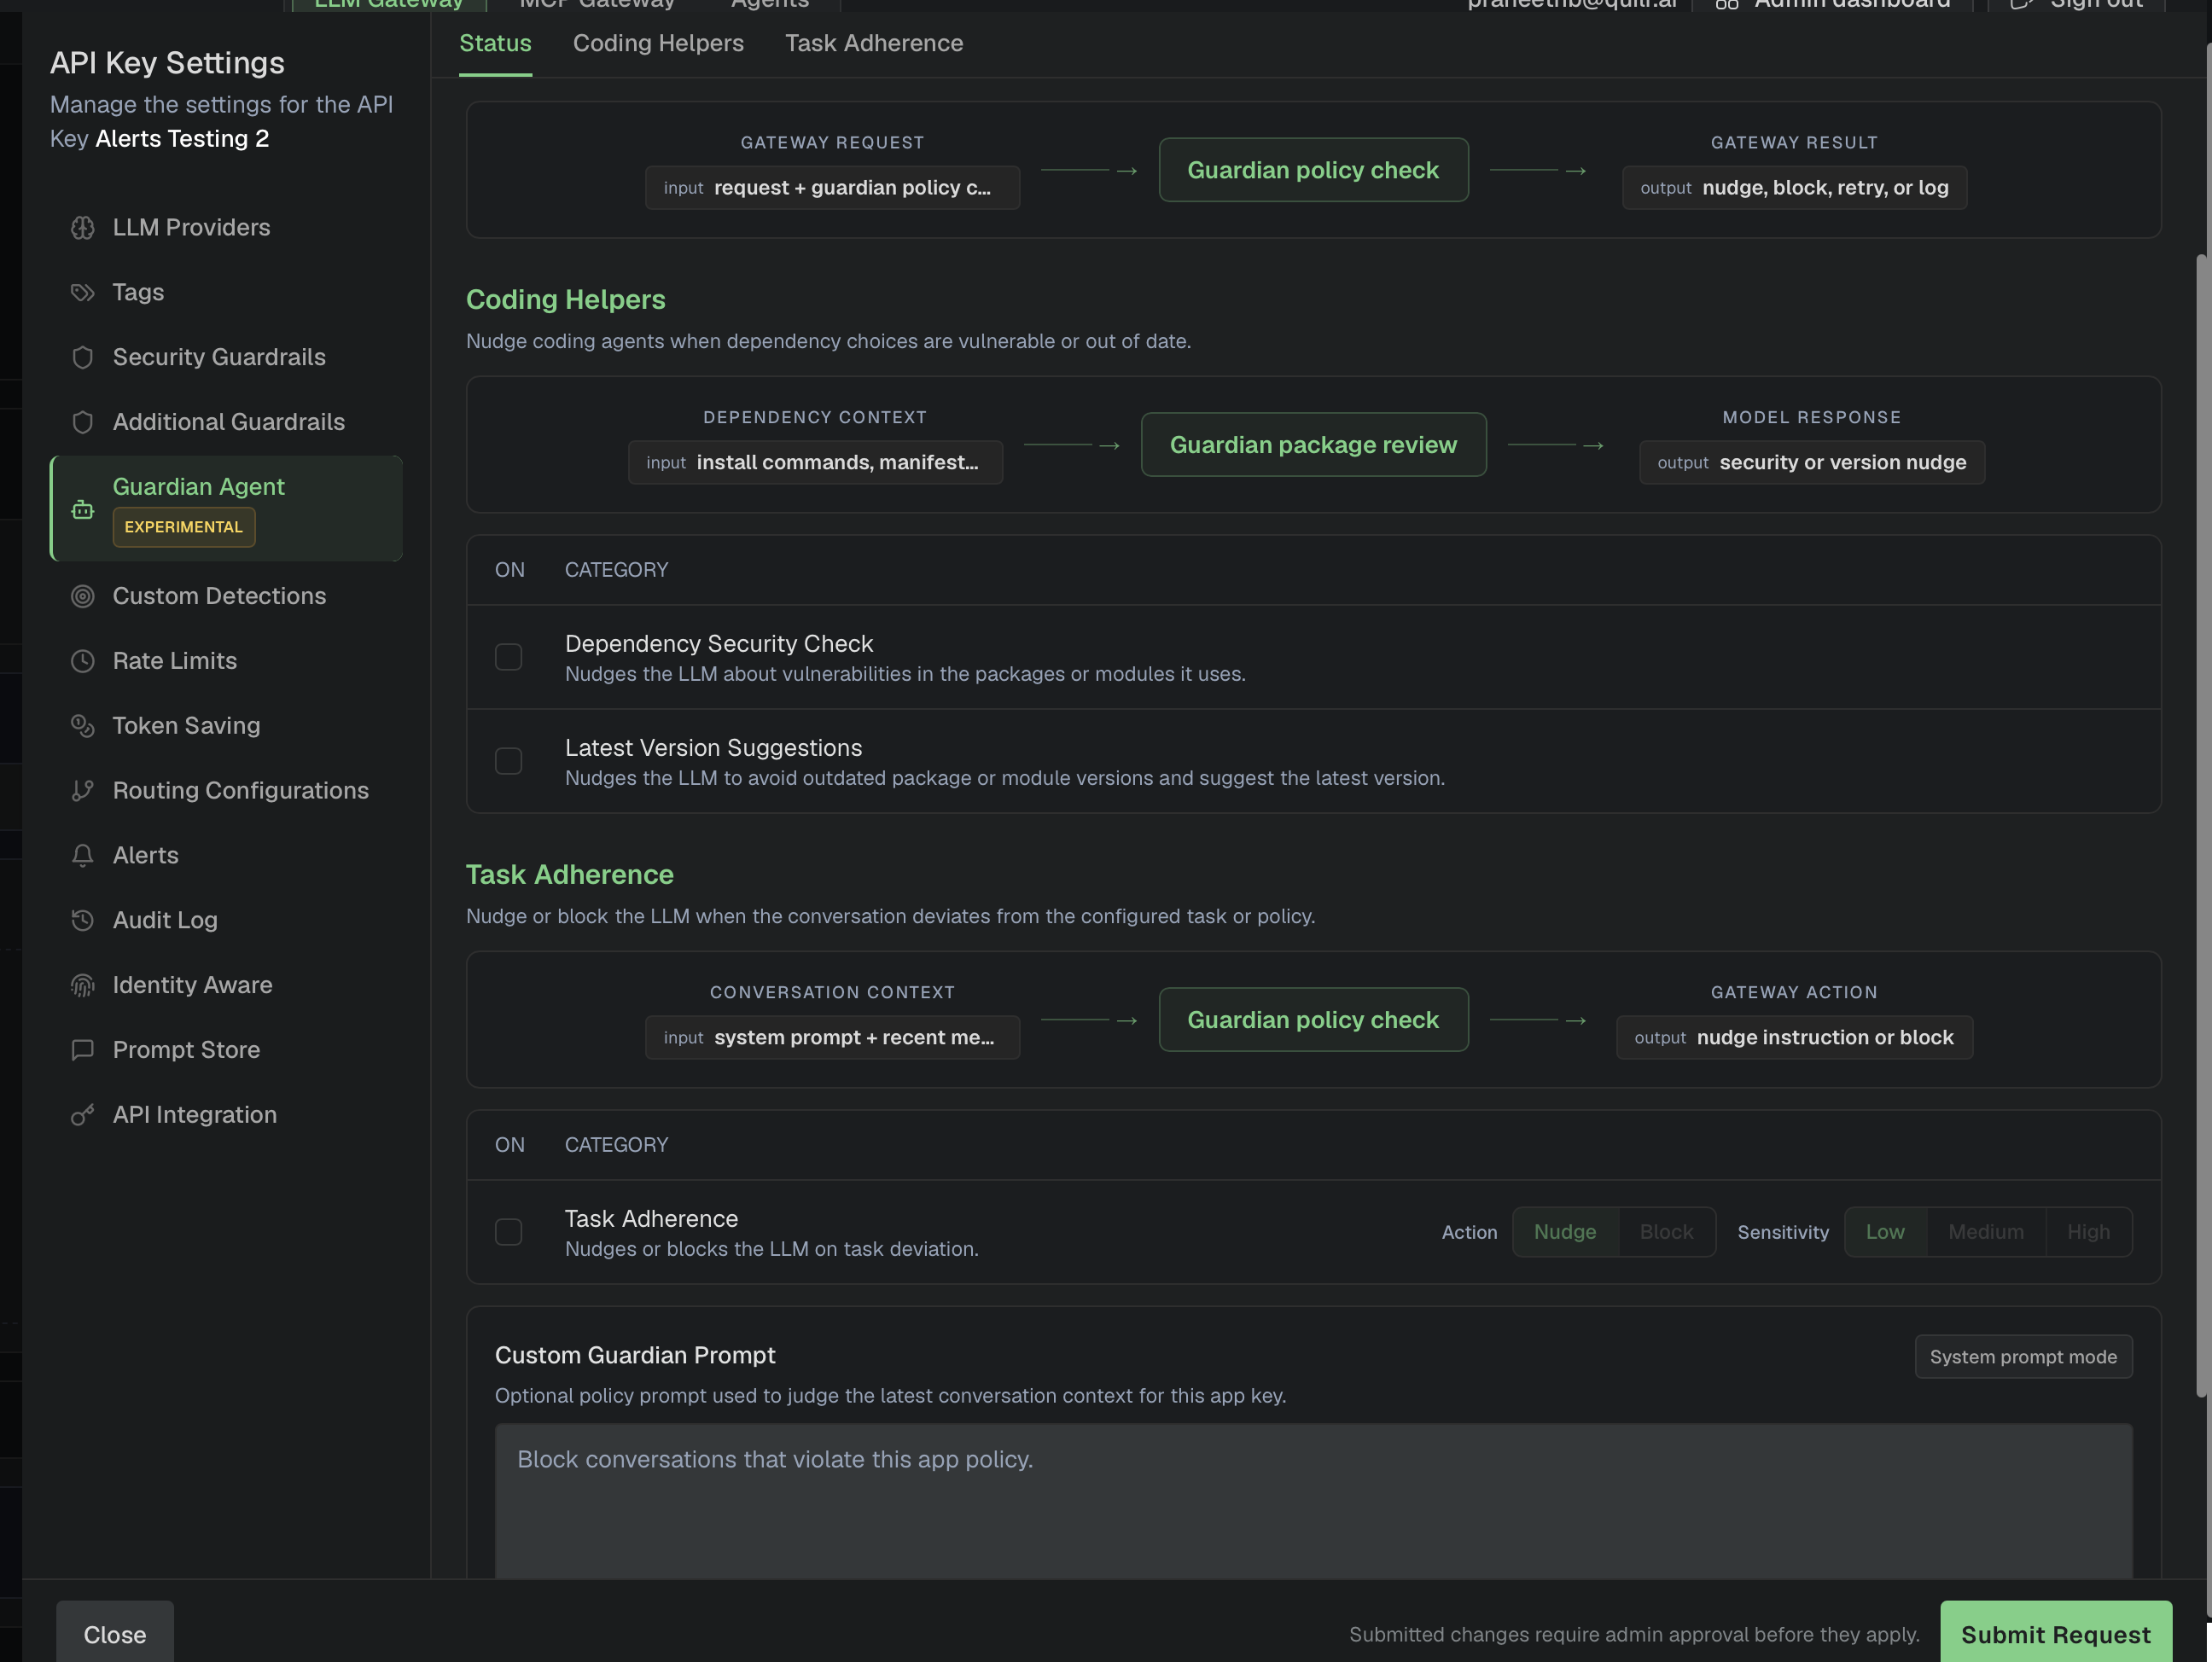
Full details: Guardian Agent.
Token Saving
Rewrites eligible input so fewer tokens reach the provider, with the meaning intact. No SDK changes on your side. Four transforms, each toggled on its own:
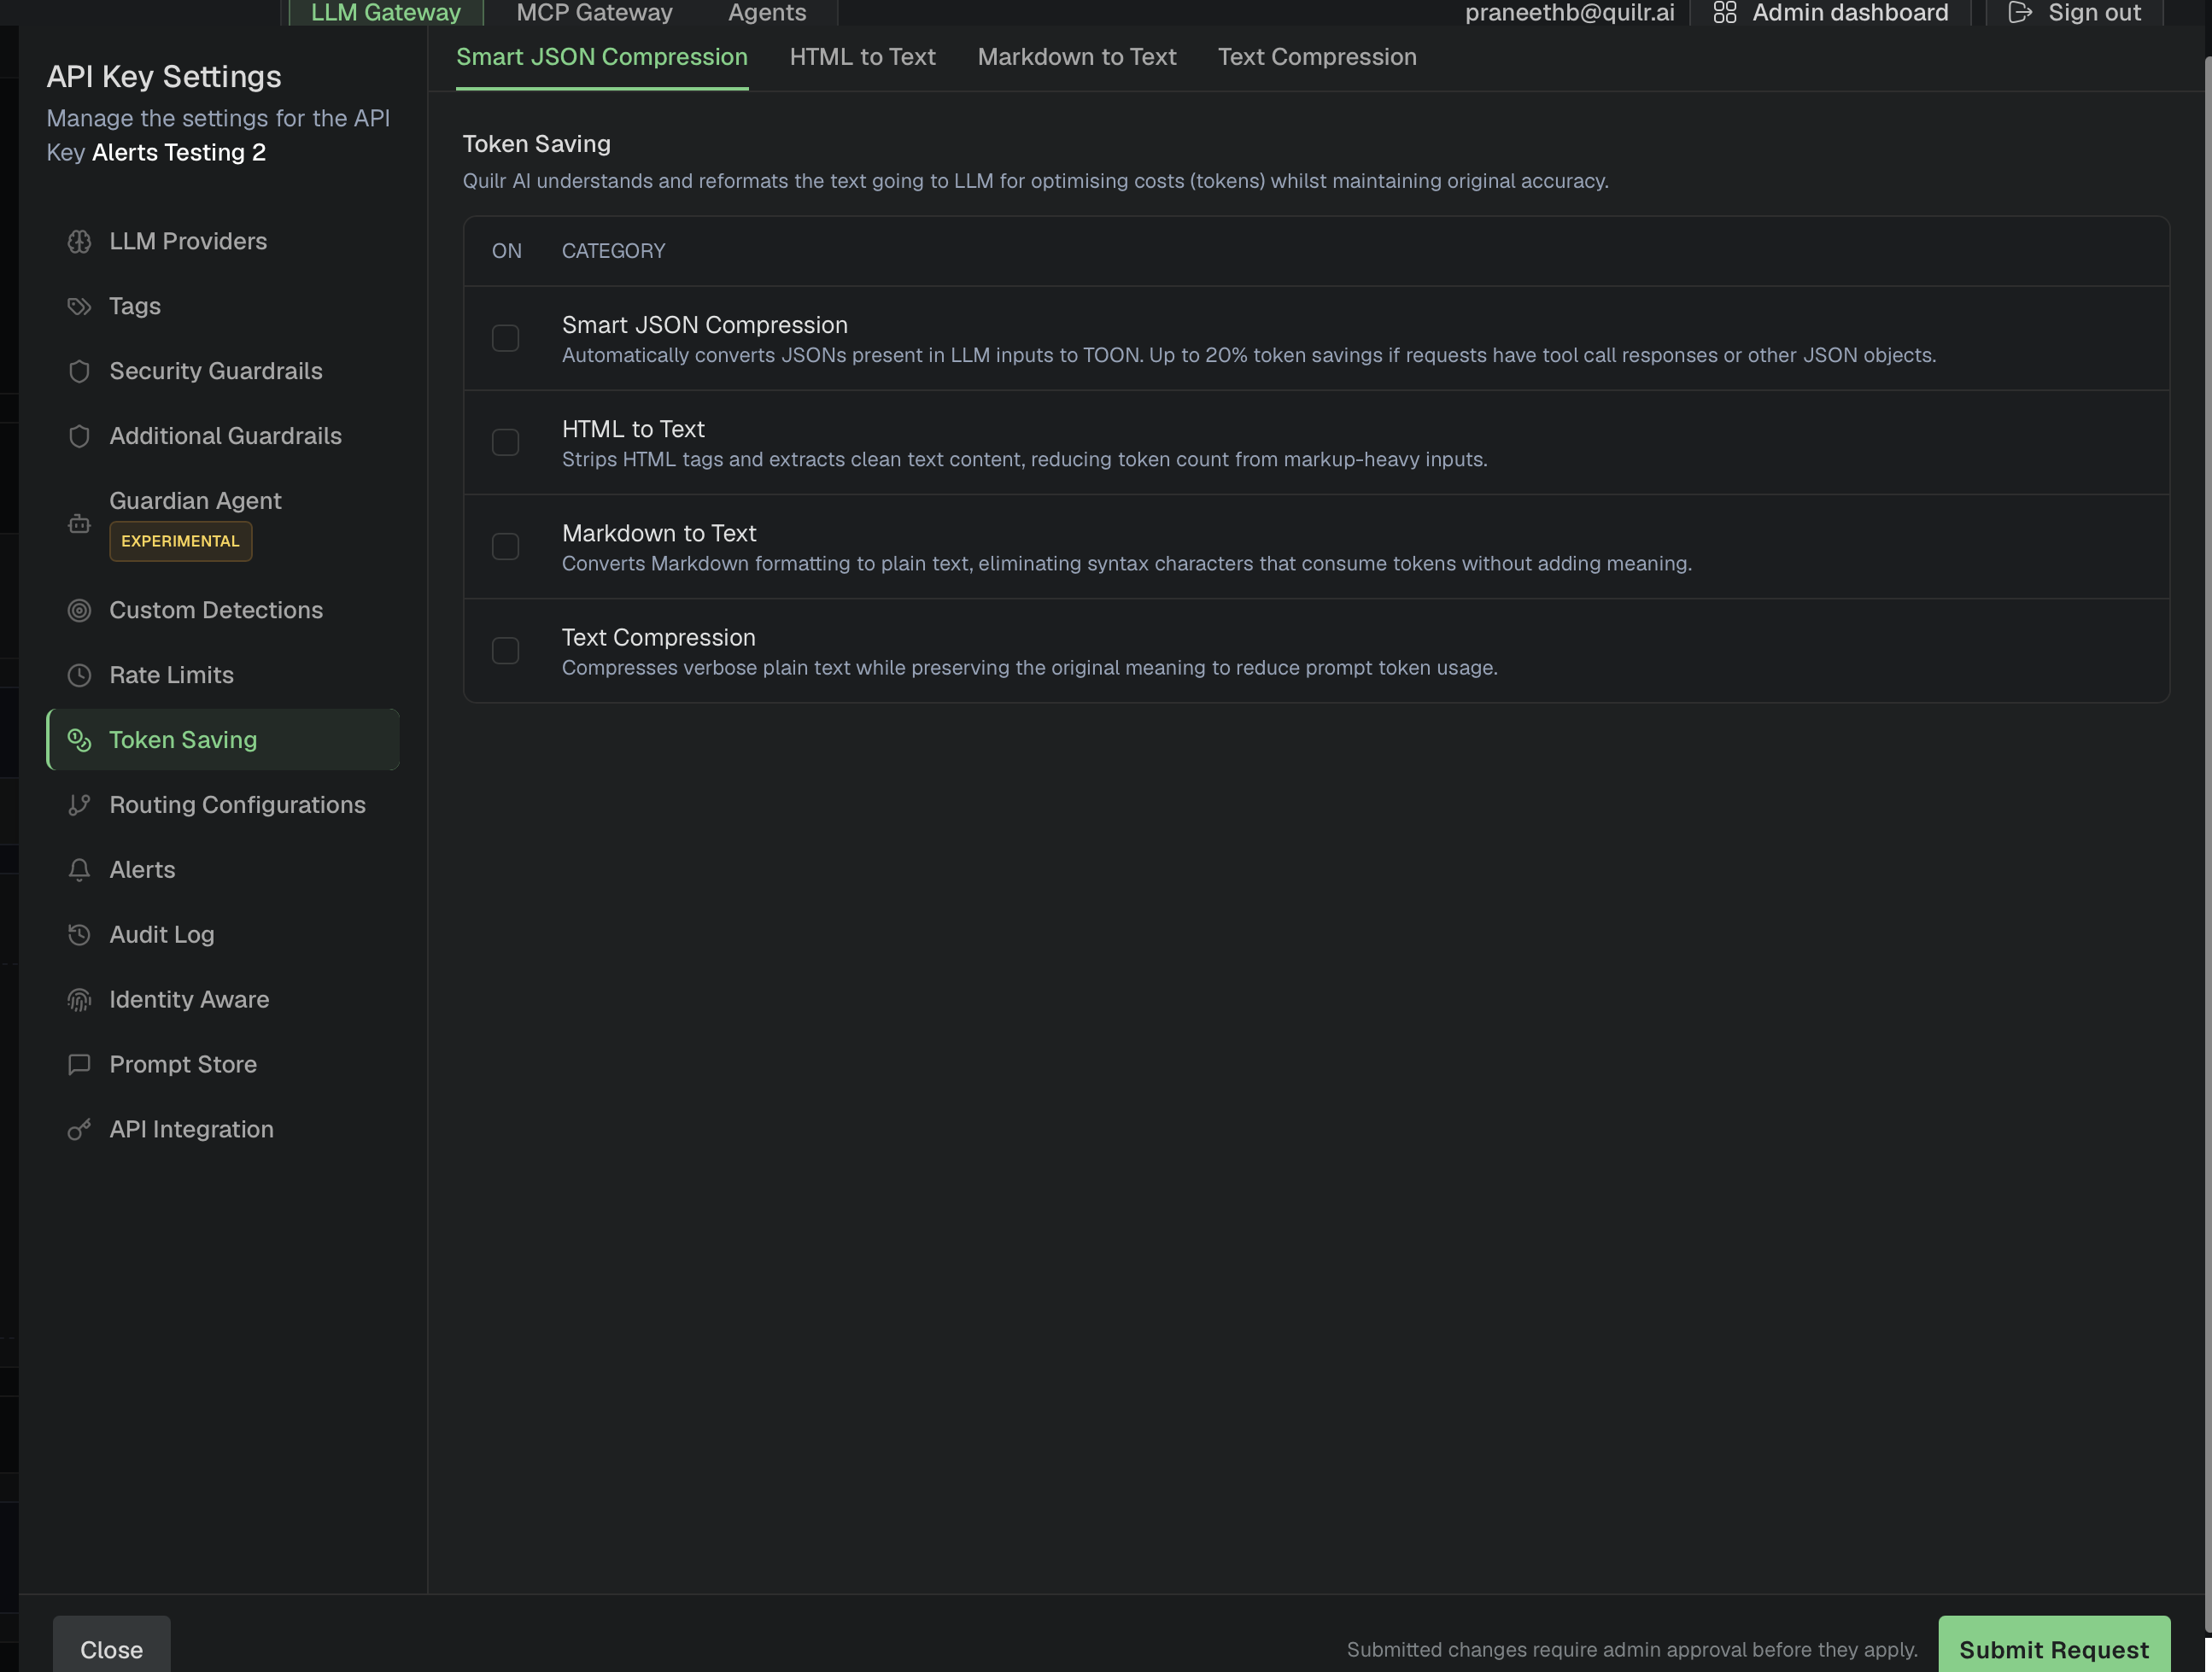
Transforms apply to input only, so responses come back untouched. Full details, including what each transform does and does not rewrite: Token Saving.
Custom Detections
When the built-in categories do not describe what you need caught - a competitor name, an internal project codename, a domain-specific phrase - define your own intent from a name, a description, and example prompts that should and should not match. It then runs alongside the built-in guardrails with its own block, monitor, or redact action.
Full details: Custom Intents.
Rate Limits
Requests per minute, hour, and day; maximum input and output tokens; a token budget over a window; key expiry; and a response timeout. All of it is enforced at the gateway before your request reaches the provider, so raising a limit here is what fixes a 429 from Quilr rather than from the provider.
Full details: Rate Limits.
Routing Configurations
Routing groups let one model name spread across several models, providers, or accounts - weighted by request count or by tokens, with context tiers for small versus large prompts, and automatic failover. Your code keeps calling the group name.
Full details: Request Routing.
Identity Settings
Controls how the gateway identifies the end user behind a call: the X-User-Email header for trusted backends, or JWT validation via JWKS or a PEM public key, plus enforced identity and allowed domains. Named self-service keys already carry your identity, so these settings are about the users of the app you are building.
Full details: Identity Aware.
Prompt Store
Keeps system prompts versioned centrally so you reference them by ID (quilrai-prompt-store-<id>) instead of pasting prompt text into your code. One system message can reference several stored prompts, mix in your own inline instructions, and fill in template variables.
Full details: Prompt Store.
Checking a Change Worked
Once a request is approved (or saved directly), the change is live on the next request. To confirm it:
- Send a request with your key.
- Open the Findings tab to see which guardrails fired and what action was applied - the categories and actions are explained in Security Guardrails.
- Open the Logs tab for the request itself, including token counts, which show the effect of Token Saving and of the model your routing group picked.
If your admin runs Red Team Testing against the app, those results are a broader check on the same guardrail configuration.
Troubleshooting
Related
Self-service
- Overview - concepts, credential modes, and the key format.
- Admin Guide - how access is configured on the admin side.
- Audit Log - how change requests are reviewed and rolled back.
Calling the gateway
- Quick Start - the four steps to a working call.
- Integration Guide - endpoint URLs and code examples per SDK.
- Provider Support - providers, endpoints, and API formats.
- Unified Completions - one request format across providers.
- SDK Mode - scan content from your code without proxying an LLM call.
Settings you can request
- Security Guardrails - categories, risk levels, and actions.
- Custom Intents - your own detection categories.
- Guardian Agent - dependency checks and task adherence.
- Token Saving - the compression transforms and what they save.
- Rate Limits - request rates, token budgets, and key expiry.
- Request Routing - routing groups, load balancing, and failover.
- Prompt Store - versioned system prompts referenced by ID.
- Identity Aware - identifying the users of the app you build.
Logs and monitoring
- Conversation Grouping - group multi-turn requests into one thread.
- Agent Monitoring - tie calls to the agent run that produced them.
- Log Export API - read request logs from your own tooling.